Monday, September 26, 2011

Sweet Potato & Black Bean Chili

It felt like real fall this weekend. The kind of fall I had growing up in a small town in the interior. It was slightly chilly and windy, but now and then rays of sun broke through the gray skies. Leaves crunched under your feet. There were cookies and cups of tea with friends. Sweaters I’d packed away in the spring came out of their hiding places. 


But sure enough, Monday morning I woke up in the dark, rain hammering the windows.  I wanted nothing more than to burrow deeper under the covers, and to stay that way all day. But alas, I am a grown up. I have responsibilities (ugh). Chin up. Buck up. Don’t forget your umbrella. 


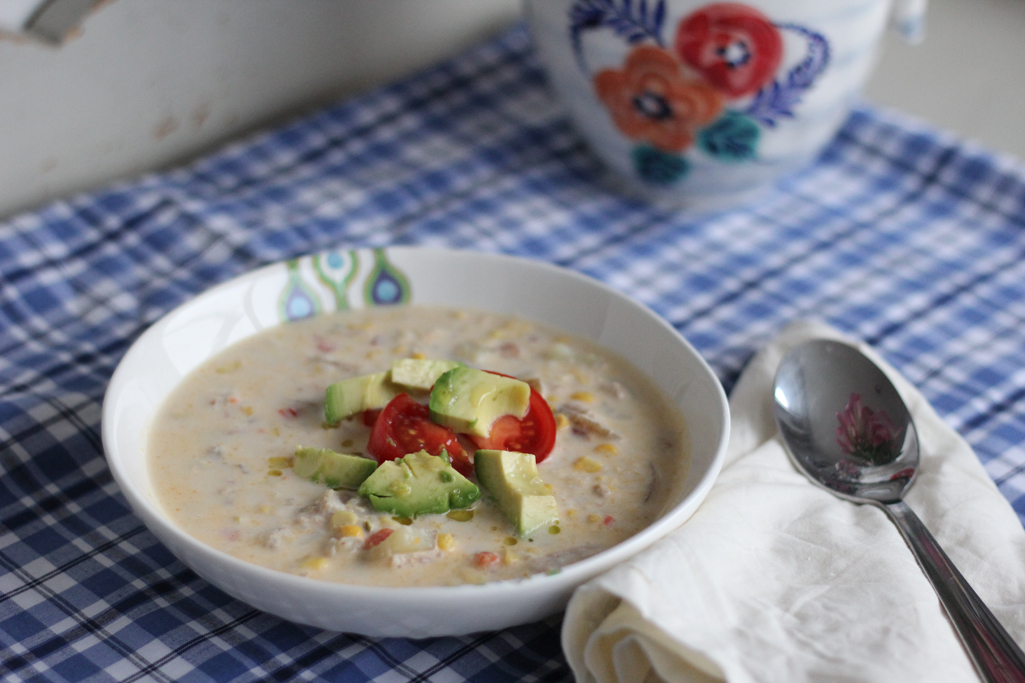
Knowing you are coming home to this dinner makes a cold, wet commute a bit more bearable. It is hearty enough for a cozy Sunday dinner, but using canned beans makes it a cinch to throw together on a busy weeknight as well. 


 And with the chipotle and cayenne peppers, it packs quite a punch in the spice department. If you feel the sniffles coming on, this might just do the trick. Sweet potatoes and beans are quickly becoming a favorite combination of mine. I hope you like them too.


Sweet Potato & Black Bean Chili
 
As always I am a chicken when it comes to spiciness, this was enough to warm me up and clear my sinuses too. If you like more heat, add another chipotle pepper or up the cayenne to ¼ tsp. 


Ingredients

Olive oil
1 Medium onion, diced
3 Cloves garlic
2 Carrots, diced into rounds
1 Red bell pepper, diced
2 Chipotle peppers in Adobo, chopped to smithereens or crushed with a spoon
2 Tsp.  ground cumin
1 Tsp. chili powder
1 Tsp. paprika
Pinch cayenne pepper
Salt and pepper to taste
2 Medium sweet potatoes, peeled and diced
1-2 Cups chicken or vegetable stock
1 can (800 ml) whole tomatoes and their juice
2 Cobs fresh corn, removed from cob or 1 cup frozen corn (I used a combination)
2 cans (540 ml) black beans
2 Tbsp. liquid honey


Toppings (optional)

Avocado
Cilantro, roughly chopped
Lime Wedges
Sour Cream
Shredded Cheese


1. Place a large pot or Dutch oven over medium-high heat, drizzled with olive oil (go around the pan twice). When pan is hot add the onions and garlic and saute.

2. When the onions begin to turn translucent, reduce the heat to medium. Add the carrots, peppers, chipotle peppers and spices. Season with salt and pepper. Allow the mixture to cook for a couple of minutes; it should begin to smell quite aromatic. Then add the sweet potatoes and let everything cook for a few minutes more. 

3. Add the tomatoes, corn and 1 cup of stock to the pot. Crush the tomatoes with the back of a wooden spoon or spatula as you stir.

4. Bring the stew to a boil, then cover and reduce heat to low. Allow to simmer for 20-30 minutes, or until the potatoes are cooked through and the broth has reduced.

5. When the sweet potatoes are cooked through, add the black beans. Be sure to drain them in a colander and rinse with a bit of cool water before dumping them into the pot.

6. Taste the broth and adjust the seasoning if needed. Drizzle in 1-2 tablespoons of honey, just to counter act the spice and add some sweetness.  At this point I added ½ cup more broth. You can add more broth if you like or leave it as is. It depends entirely on how soupy you like your chili.

7. Once the beans have heated through you can serve up your chili. Top individual bowls with whichever toppings you prefer and enjoy. I think Cilantro, lime, and sour cream are a must, while The Boy loves avocado and melted cheese.  


This recipe made 2 big dinners for two of us, with leftovers for lunches. In fact, I’ve put a couple of containers in the freezer for quick workday lunches down the road. 


Future Maia loves when past Maia looks out for her like that.


Wednesday, September 21, 2011

Creamy Corn Chowder with Crab and Bacon


 I am really into soup. Like reeeeally into it. Between September and March I get a little bit obsessed. Soup is just everything food should be to me. A bowl of soup on a cold night is like a big hug. It is the only antidote to the rainy Vancouver weather. It is warming and nourishing and cozy. Soup can be anything you want it to be. It can be hearty and filling or healthy and light. Rich and indulgent or bright and refreshing. Another good thing about soup? Only one pot to wash!


And for couples/ families with conflicting schedules, soup makes life easy. I like to make a big pot on Sunday (or put it in the slow cooker on Sunday night to have on Monday). Keep some stuff for salads and
sandwiches or burritos on hand and it will feed us for most of the week.

That-boy-I-live-with isn’t a huge fan of soup; he tends to think they are more of a side dish than the main event. I take this as a challenge and try to make soups that are chunky and hearty one-pot meals in a bowl. When I ask if he likes whatever I made for dinner, he will always say that it is “fine”, regardless of how much he likes it. It’s when he goes back for seconds that I know I have won. One thing I will tell you is that he definitely went back for seconds of this.


It is usually bacon, potatoes, or cheese that will win him over. And this soup has 2 out of 3.


Creamy Chowder with Crab and Bacon
Makes 1 large pot (about 8 bowls)

The Jalapeno adds flavour and just a touch of spice. I am a wimp when it comes to heat, but if you like things hot, go ahead and add another pepper.  Cayenne pepper or hot sauce would work as well. Oh, and use real crab please? You will notice the difference, I promise (Psst... I got mine at Costco.I don't think it's Ocean-wise.Don't tell).

Ingredients

6 stips bacon, chopped
1 medium white onion, diced small
2 jalepeno peppers, deseeded and diced very small
3 cloves garlic, smashed or pressed
1 red bell pepper, diced
1/2 tsp. Smoked paprika
¼ tsp. White pepper
2 cups red new potatoes – quartered (or 2 cups of any potato, chopped into rough chunks)
5 ears corn – cut off cobs
5-6 cups vegetable or chicken stock
220 grams (or ½ tub) cooked crab meat
1 cup heavy cream or whipping cream (yes, 1 whole cup)


  1. Heat a large pot or Dutch oven over medium-high heat. Add chopped bacon to pot and saute until the bacon begins to crisp up and fat is rendered. Remove bacon bits with a slotted spoon, set them on a dish lined with paper towel to absorb fat, and set aside. 
  2. Reduce heat to medium and add onions. You can add a drizzle of olive oil here if you did not have a lot of bacon fat. When the onions are translucent, add the jalapeno, garlic, bell pepper and spices. I salted my soup here and did not salt it at the end. It is up to you when you do it.** 
  3. After about 5 minutes the onions should start to brown and the peppers will begin to cook. At this point add your chopped potatoes. Allow these to cook for a couple of minutes before adding the stock. ***
  4. Add the stock and corn and bring soup to a boil. Reduce heat to medium-low and simmer until potatoes are cooked though.
  5. Stir the crab meat into the pot and add the bacon back in as well.
  6. Just before serving, add the cream to the pot. Make sure your soup is not boiling when you do this or there is a chance it could curdle. I have never had this happen, but I have heard rumors. Add salt to taste, if necessary. 

Optional: Chop some fresh tomatoes and ripe avocado into chunks, drizzle with olive oil and sprinkle with a bit of course salt. Place on top of each bowl right before serving. Not necessary but definitely yummy.


And have some warm crusty bread on hand for dipping.


Enjoy! 


XO, 


Maia


** A note about Salt: I tend not to measure the salt I add to my soups, I just take the salt grinder and go around the pot a couple of times until it feels right. If you don’t have good eye for amounts, I suggest you wait until the soup is almost done, taste the broth, and then add salt a bit at a time until it makes you happy. Always err on the side of caution when using store bought broth, as you can never be sure how salty they will be.
*** A note about stock: If you have homemade stock on hand that is of course the best. But it is rare that I have that, since I only roast a chicken a couple of times a year. Instead, I use better than bullion stock bases. I sometimes buy the liquid stock in the tetra packs and it works well too. I just find this more convenient for when I want a little bit of stock, and it is cheaper too. Since it is soup season again, I might stock up on the liquid kind again. If you do buy the liquid stuff, go for reduced sodium. With the better than bullion, I use 6 cups of water with the amount of base meant for 4-5 cups, since I find it too salty at full strength. Whatever you do, please don’t use those dried up cubes of bullion. Who really knows what’s in those???

Wednesday, September 14, 2011

So long, Summer: Mini Tomato Gratins and a Cheesy Tomato Tart

Oh, Summer. How I’ll miss you.


Early morning sunshine. Long, lazy days. Flip flops and summer dresses. Sand covered toes and salt soaked hair. The smell of fresh cut grass and barbecues blazing. The sounds of birds chirping and children playing. Cool sweet Gelato. Hot buttery corn. The biggest juiciest cherries and the world’s most perfect peaches. And the tomatoes. Oh, the tomatoes.


Summer, you came so late. And left us far too soon.

With the season being what it was, there wasn’t nearly as much beautiful summer produce as I remember there being in past years. But I still hit up the farmers market and brought home as much as I could possibly carry. 

I have a funny relationship with tomatoes. I think when they are good, they are SO good. I can eat a whole bowl of those little candy-like cherry tomatoes. Or cut a big orange heirloom beauty into thin slices, sprinkle with some course sea salt, and have at it. But when they are bad… I am not a fan. The tough unyielding skin? The mushy insides that lead to a slimy seed explosion in your mouth? No, thank you.  Those tomatoes get roasted to oblivion with garlic and onion. Or stewed over a low flame for hours on end. Anything to transform them into something more savory.  But late summer tomatoes are of the best kind. And after eating a few pounds of them fresh, I decided I should get creative.


One of these recipes was a huge success. The other, not so much. The first was inspired by this recipe from Heidi at 101 cookbooks (her new cookbook is my new favorite thing by the way. The pictures alone are breathtaking). But I kind of wung it (winged it? Is there a past tense of wing it???).

I layered some tomatoes with these cute little new potatoes and some basil. Dumped over some cream and parmesan. Stuck it in the oven. And waited. And boy was it ever worth the wait. These made a lovely little meal with a single poached egg perched atop each gratin. I could easily see a casserole sized version as a side dish for entertaining. Maybe along side a roasted chicken?  Either way, it’s the perfect thing to enjoy as the first hints of autumn set in. Warm and comforting, but with those wonderfully bright summer flavors.


Individual Tomato Basil Gratins

Makes 2 servings
 
As I mentioned, I kind of made this recipe up as I went along. For this reason, I didn't weigh the ingredients and I am sorry for this. It will surely make re-creating it a bit of a challenge. But I encourage you to be instinctive with this one. Do two or three layers of potatoes and tomato, whatever your gratin dishes will accommodate. Add whatever cheeses or fresh herbs you have on hand and have fun with it. A mandolin would also come in really handy here for slicing the potatoes, but I made do without one. Just be sure to slice the potatoes rather thin and evenly, and be careful!

Ingredients

3-4 cups small new potatoes, thinly sliced
8-10 oz. tomatoes, I used about 6 of varying sizes
1/2 cup whipping cream
1 bunch fresh basil leaves, thinly sliced
Salt and freshly ground pepper
About 1 cup of any freshly grated sharp cheese - Parmesan, Grana Padano, or Asiago
Butter to coat pans 


1. Preheat oven to 350F. Grease gratin dishes with a bit of butter. 
2. Thinly slice potatoes to about 1/8 inch thick. Place in a bowl with cream, salt, and pepper.
3. Use a knife to slice the tomatoes to between 1/4 and 1/2 inch. Slice basil and grate cheese. I use one of these and I love it.
4. Start with a layer of potatoes in the bottom of your gratin dishes, then tomatoes, basil, and cheese. Repeat until you reach the top and drizzle any remaining cream. Finish with a generous layer of cheese. Cheese makes me happy. 
5. Cover with foil and bake for 30-40 minutes. Remove foil and bake for another 15-20 minutes,  or until the top is browned and cheese is bubbly. 

 
The second dish seemed like a really good idea at the time, but I wish I had gone about it more thoughtfully. Using tomatoes in some sort of pie or tart had been on my mind for ages. This recipe from Simply Recipes  was a candidate. But this one, posted on The Kitchn but originally from David Lebovitz's blog, was the one I chose in the end. A decision I later questioned. 


Confession: I took these pretty little pictures. And then put the tart back in the over for another, oh, hour or so.


I had wanted to (for once) follow the recipe. A recipe which did not instruct me to par bake my crust. Maybe that had to do with the crust recipe provided in the original recipe? Or a temperature discrepancy? I don’t know. But me, wanting to take a shortcut on a Wednesday night, I used a store bought crust. I should have known better. I think cheats like using a ready made store bought crust can be great time savers, and usually don’t have much impact on the final results (I use the Pillsbury ones-in the refrigerator isle, not frozen-they are unbaked and come rolled up in a tube, and I think they are quite good. No I am not ashamed. Sorry Mom). But taking a shortcut usually means making some adjustments to your recipe. And as I learned here,  the crust should always always be par baked. Mom always told me to par bake the crust, why didn’t I listen?


By the time the crust was cooked through enough to eat, the tomatoes and cheese had started to burn.


And it was Late.


And I had filled up on chips and salsa.


Whatever the reason, this just didn’t look appealing to me anymore. And I certainly could not get The Boy to touch it. I took a few bites, and the rest sat in the fridge for a few days, until I no longer felt too guilty throw it out. What a sad fate these gorgeous tomatoes met.  


I did say we were here to learn together, didn’t I? The lesson here? Trust your instincts. Pay attention to what you know to be true, even if a famous chef says otherwise. 


And savor summer, because it will be gone before you know it.


Rain is predicted here in Vancouver tomorrow (back to our usual ways), and I have started to dream of pasta casseroles and baked potato soup. Of fuzzy slippers and cups of tea. 


But I am not in any hurry.


XO,


Maia


Tuesday, September 13, 2011

Fish Cookies for Jack!

 
This has been a busy week with work, school, and family and I am simply exhausted. So I will try to keep this post short and sweet. Just like these cookies. My co worker’s adorable son Jack turned two a few weeks ago. The party was held at a local water park and Heidi went all out with an Under the Sea theme. Including the most amazing Fish Cake! Heidi has some talented friends! I made these cookies for the little ones goodie bags. They were well received by the grown ups too.


I took a couple of Wilton decorating classes this summer. And I did learn some great things there, but most things cookie related I have picked up from Bridget at http://bakeat350.blogspot.com/. She is so creative and talented. I only wish I could be as dedicated to cookie making as she is. It takes patience, this cookie thing. But once you get in a groove it can be really fun! Just do me a favor and don't look at Bridget's cookies immediately after viewing mine, it might make me look bad. Thanks.


The recipes I used were both Wilton, as they were the ones given out in the classes I took . However, I found the cookie dough to be a little too soft/ sticky for rolling and cutting. It could also have been that it was very warm in my apartment when I was making them. Rolling them out onto parchment paper (rather than straight onto the counter top) and using lots of flour makes a world of difference though. I dip each cookie cutter into flour before cutting which seems to help get a clean edge. And they are addictive-ly yummy. Still, I might try a different cookie recipe next time. 

Since I do work during the day, I spread my cookie making out over a few evenings. Making the icing one day, the cookies the next, and then decorating over the next couple of days. The Royal Icing will keep in an airtight container at room temperature for about a week. Next time I make cut-out cookies I will try to get some shots of the process for you.

Here are the Recipes!

Basic Sugar Cookies

Recipe from Wilton

I did these in my stand mixer, but they can easily be done by hand. 

Ingredients

1/2 cup butter
1 cup sugar
1 egg
1 3/4 cup all purpose flour
1 tsp. baking powder
1 tbsp. milk
1 tsp. clear vanilla extract
1/4 tsp. salt

1. Preheat oven to 375 F. Make sure your oven is accurate or these lil guys will burn. I highly recommend you have an oven thermometer (mine runs at least 50 degrees hot). If using a dark cookie sheet reduce heat by 25 degrees. Line cookie sheets with parchment paper. 

2. Cream butter and sugar.Add egg, vanilla and milk. Mix until smooth.

3. In a separate bowl whisk together the flour, baking powder and salt. Add to wet ingredients and mix to combine. Refrigerate dough at least 1 hour (or overnight). The colder the dough, the better.

4. Spread a piece of parchment or wax paper on your counter top. Get yourself a measuring cup or bowl of flour to keep at hand. Sprinkle some flour liberally over the papered surface, your rolling pin, and your hands. 

5. Take between 1/4 and 1/2 half of the dough out to work with. Leave the rest in the fridge to keep it as cold as possible. Roll out this ball of dough to about 1/4 inch thick, adding more flour as necessary. Wilton recommended 1/8 inch but I found the thinner cookies to be far too fragile to work with. 

6. Dip cutters into flour before each use. The colder the dough, the cleaner your edge will be. Very carefully transfer each cookie to the lined cookie sheet. I use a small offset spatula to do this- coated with flour of course. Try not to crowd the pan, I fit about 8 cookies per sheet. Scraps can be rolled back into the cold dough to be used again. 

7. Bake 12-15 minutes or until the cookies start to brown just slightly around the edges, turning half way through the cooking time. Place pans on a cooling rack for 5 minutes then remove from sheet to cool fully. Makes 25-50 cookies, depending on size. 

 Royal Icing (Meringue Powder)

 Recipe from Wilton

Ingredients
3 level tbsp. Meringue powder
4 cups (1 lb/ 454 g.) sifted icing sugar
8 tbsp. water 

1. Mix meringue powder with sugar. 
2. Add water 1 tbsp. at a time while mixing on low.
3. Increase speed to high and beat until stiff peaks form, 10-12 minutes. 

Transfer Icing to a piping bag fitted with the tip of your choice and get decorating!


This thicker icing is what I use to outline the cookies. To fill in the cookies, take a small bowl of the icing and add water 1/2 tsp. at a time. You've got the consistency right when a drop of the icing disappears into the dish before you've counted to ten. I use little squeeze bottles like these to fill in my cookies. Accents can be added with more thinned out icing while the cookie is wet, or more full strength icing once the cookie has dried, depending on the look you want. Does this all make sense? As I mentioned above, check out Bake @ 350  for some great cookie decorating tips, or ask me a question in the comments. Martha Stewart and the Wilton website are also good references.

Let the cookies dry uncovered overnight, and then transfer to individual bags or a large airtight container. 

Sharks and Starfish should be stored separately.


So much for short and sweet. Goodnight all. Happy cookie making!

XO,

Maia


Thursday, September 8, 2011

Black Tie Caprese Pasta Salad

This Spring I took a weekend trip to Seattle and met up with some girlfriends. Three of whom are professional chefs. Not bad company to keep. It was a fun little trip where we ate pretty much everything we could get our hands on without shame. 
 

We went Here (and ordered the entire menu).

And Here.

Took a tour of Here (and brought lots of goodies home).

And dined Here (the Tart Tatine.OMG).


We watched them throw fish at the market and waited in line for approximately two years for some mini donuts. Or 20 minutes, whatever. I picked up these beautiful little bow ties at a shop outside of Pike Place Market. I can't remember the name, but Google says it might be here.


The store was full of fancy schmancy things like saffron infused oil and truffle salt (never liked truffle much). I taste tested the gourmet offerings but I wasn’t compelled to bring anything home until I saw these little guys. So dapper! I still have a bag of rainbow striped ones in my cupboard waiting for the perfect recipe. Any suggestions?

I wanted to use the pretty pasta in a dish that would let it shine, something without a thick sauce to mar its beauty. I think this simple caprese pasta salad does a fine job of that. And this dish will be perfectly delicious with whatever pasta you use. It’s all in the balsamic reduction. That’s where the magic is. It is delightful drizzled over thin slices of steak as well.


Caprese Pasta Salad with Balsamic Reduction

Ingredients

250 gr. dry pasta of your choice
1 pint cherry tomatoes
1 tub (500 gr.) fresh mozzarella/ boconcini (I used Tre Stelle pearls, I like the slightly larger ones as opposed to the mini mini ones)
1 bunch fresh basil leaves
Olive oil
Salt and pepper to taste

1 cup of your favorite balsamic vinegar - I used fig balsamic!


1. Bring a large pot of salted water to a boil. Add pasta and cook until just al dente. When the pasta is cooked, drain in a colander and drizzle with a bit of olive oil to keep it from sticking to iteself. Refrigerate to cool.

2. To make balsamic reduction add 1 cup of the vinegar to a small saucepan set on med-high. Bring to a boil while whisking constantly and quickly. Don't leave the room while this is going on, it can burn up on you very quickly! It is done when the vinegar is thick and syrupy and has reduced by about half. Set aside.

3. Make a Chiffonade of the basil by rolling the leaves tightly lengthwise and then slicing thinly perpendicularly. You should end up with fine, thin strips of basil.

4. When the pasta has cooled add the tomatoes, mozzarella, and basil. If you want you can drizzle with a little more olive oil to loosen the pasta up, but don't over do it. Add salt and pepper to your liking and mix it all up.

Drizzle the balsamic reduction over each plate. I added lots more to mine than you see in the picture. You can even make extra to use on salads, grilled steak, chicken, or fish. Yum. This makes quite a lot of pasta and the leftovers will keep for a few days. However, I do recommend bringing it to room temperature before eating, as the flavors are so much more pronounced this way. I also hate cold tomatoes. Ew.

Enjoy!

XO,

Maia

Monday, September 5, 2011

Blueberry Bars


August blueberries are my absolute favourite. I buy an extra pint at the market because I know I am going to devour the better part of one as soon as I get home. And I need the second one to put in oatmeal, pancakes and yummy desserts like these. The last batch I brought home, I picked the biggest one of the bunch and squealed with excitement, “This one’s as big as my thumb!”  It’s the little things, right?


This recipe is so good and SO easy. The sweet, juicy berry filling is sandwiched between the most perfectly buttery, crumbly, ever-so-slightly crunchy crust. And it really does come together in a flash. It’s a cookie version of blueberry pie, minus all the effort of making and rolling out dough. These are great for summer barbecues and potlucks, but I think they would make a wonderful back-to-school snack as well. Now, get yourself to the store and take advantage of all those 2/$4 baskets of delicious-end-of-summer-goodness. And then make these. Just do it.


Blueberry Bars
Adapted from Smitten Kitchen

The only change I made to Deb’s recipe was one of necessity. It turned out I was out of lemon, so I swapped it for limes which I had on hand. I actually liked the extra tang they brought, but you can stick to the lemon if you’d like. They will be absolutely delicious either way. As Deb mentions, these are easier to cut and eat once they have chilled completely. And we all agreed that they taste best eaten straight from the fridge - possibly at midnight, in your robe, Nigella Lawson style - or maybe that’s just me?

Ingredients

For the dough:

1 cup white sugar
1 teaspoon baking powder
3 cups all-purpose flour
1 cup cold unsalted butter (2 sticks or 8 ounces)
1 egg
1/4 teaspoon salt
Zest of two limes (or one lemon)

For the filling:

4 cups fresh blueberries
1/2 cup white sugar
4 teaspoons cornstarch
Juice of two small limes (or one lemon)


1. Preheat the oven to 375 degrees F. Grease a 9×13 inch pan.

2. In a medium bowl, stir together 1 cup sugar, 3 cups flour, and baking powder. Mix in salt and zest. Use a fork or pastry cutter to blend in the butter and egg. Dough will be crumbly. Pat half of dough into the prepared pan.

3. In another bowl, stir together the sugar, cornstarch and lemon juice. Gently mix in the blueberries. Sprinkle the blueberry mixture evenly over the crust. Crumble remaining dough over the berry layer.

4. Bake in preheated oven for 45 minutes, or until top is slightly brown. Cool completely before cutting into squares. 


Welcome to A Delightful Dish!


As my friends know, I have been meaning to start this page for a while now.  As my friends also know, I am someone who is chronically late, but I always get there eventually. I might be slightly flustered, and there might be frosting in my hair, but there will certainly be a big smile on my face. And here I am now,  so let’s get started.

This has been a lovely summer full of delicious food, which I very much want to share with everyone. Some of these recipes can be enjoyed well into fall, or even throughout the winter with some changes. Others may have to wait until next summer to be enjoyed to their full potential. The next few days will be a recap of my favorite things I have made this summer. I must get these recipes out of my brain and onto a keyboard before they get buried under piles of apples, squash, soups and stews. And then I will proceed to drag my reluctant self out of summer and jump feet first into autumn. It might be cold, but at least it tastes good.